idf.py menuconfig go to IoTivity Example Configuration, set up your Wi-Fi and enable PLGD_DEV_HAWKBITYou set up your own Hawkbit instance (see: Hawkbit documentation) or use the the instance running at hawkbit.try.plgd.cloud.
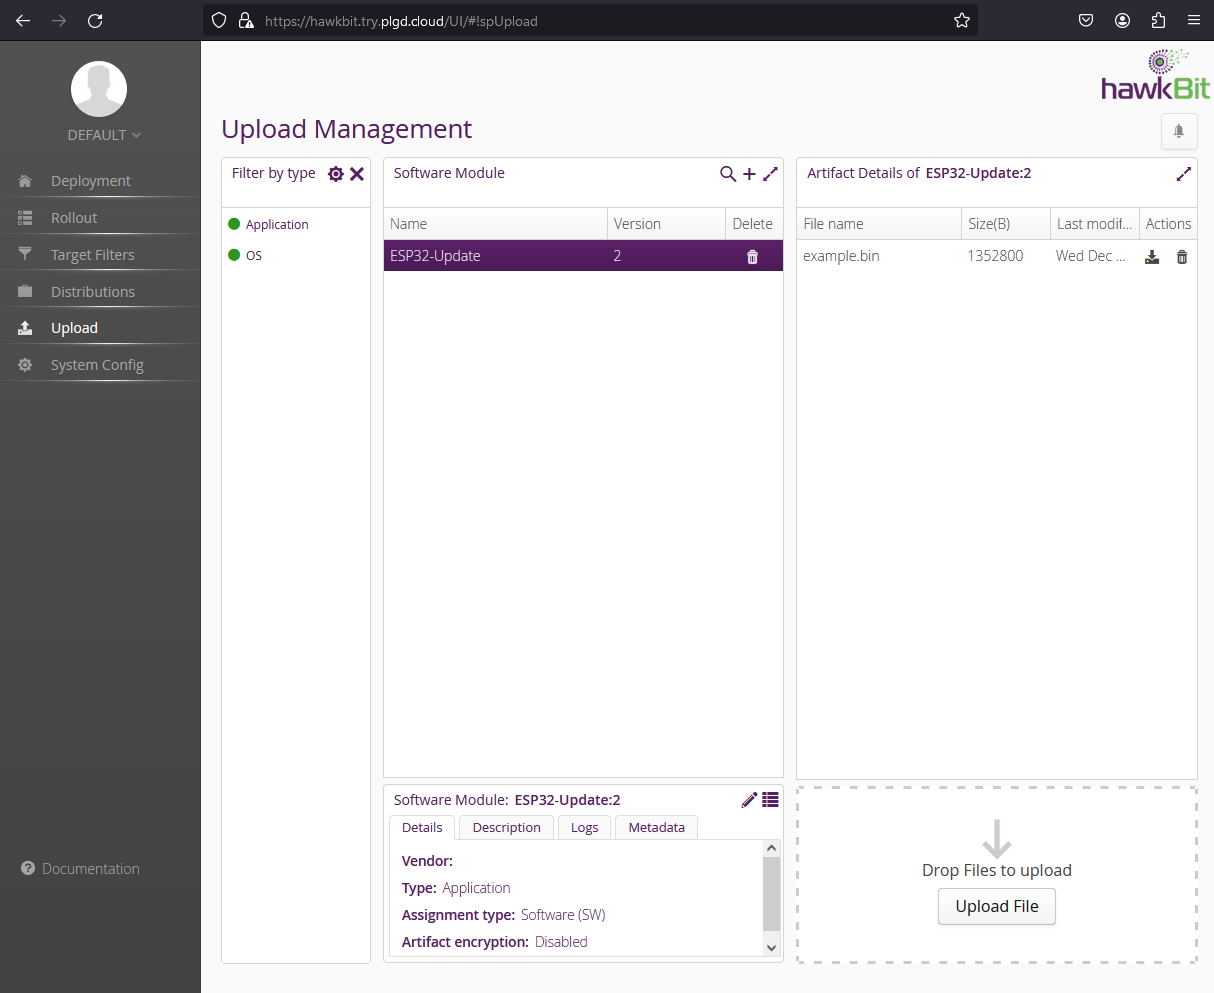
Create a software Module:
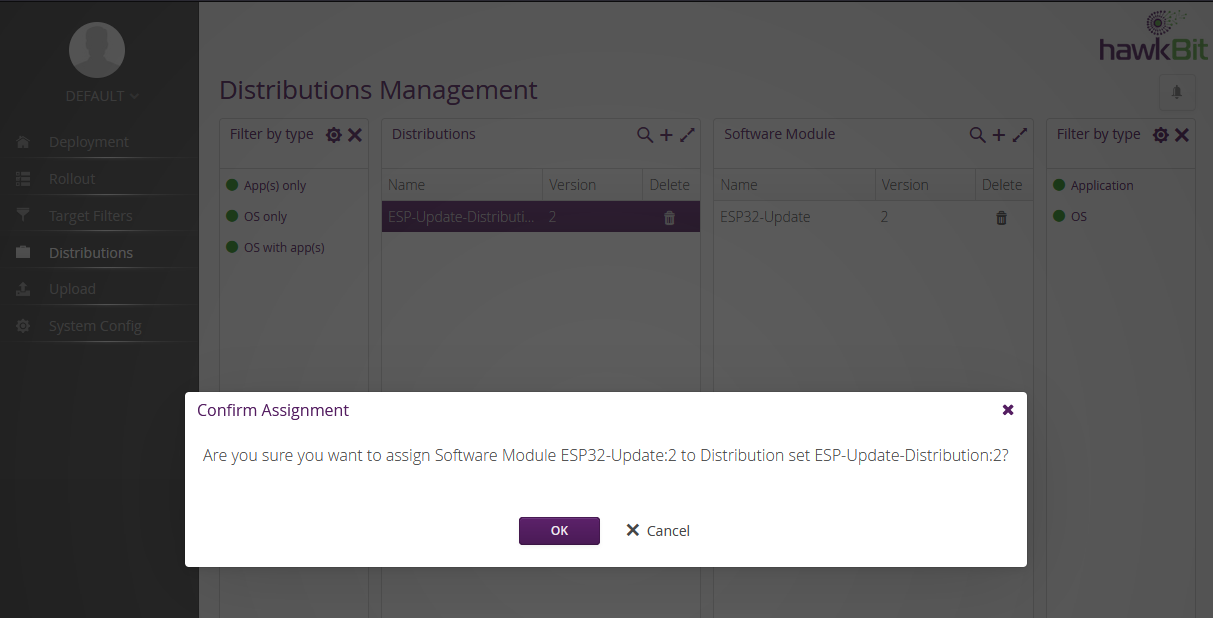
Create a distribution:

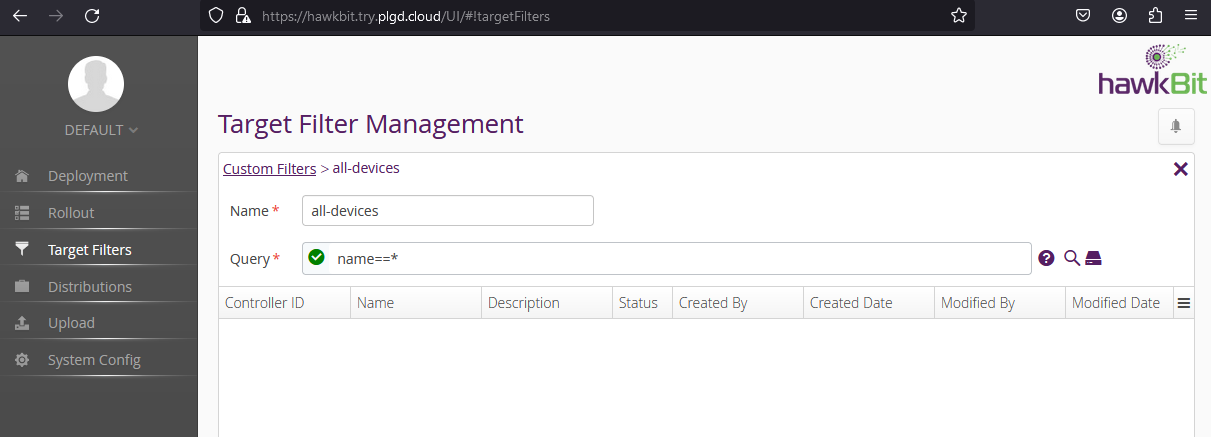
Create a target filter to match your device(s):
Since our example uses a single device we can use a simple filter that matches all devices, to create a more precise filter see https://eclipse.dev/hawkbit/ui/#target-filter-management
To execute the update we only need to create a Rollout and apply it to a device. To do that we need our device to register to hawkbit server.
The update is controlled on the device using Software Update (/oc/swu) resource, which has the following properties:
typedef struct oc_swupdate_t
{
  oc_string_t purl;    ///< package URL, source of the software package
  oc_string_t nv;      ///< new version, new available software version
  oc_string_t signage; ///< signage method of the software package
  oc_swupdate_action_t swupdateaction; ///< action to execute
  oc_swupdate_state_t swupdatestate;   ///< state of the software update
  int swupdateresult;                  ///< result of the software update
  oc_clock_time_t lastupdate;          ///< time of the last software update
  oc_clock_time_t updatetime; ///< scheduled time to execute swupdateaction
} oc_swupdate_t;
To obtain additional information about the firmware update, you can inspect the read-only Hawkbit resource (available at /hawkbit).
In the following example, we will utilize a local instance of the client-application running on port 18080 to examine and configure an ESP32 device.
However, when using the client-application we can onboard the device to <try.plgd.cloud>, which uses certificates signed by the same certificate authority. Onboarding the device will add a CA certificate to verify the server certificates.
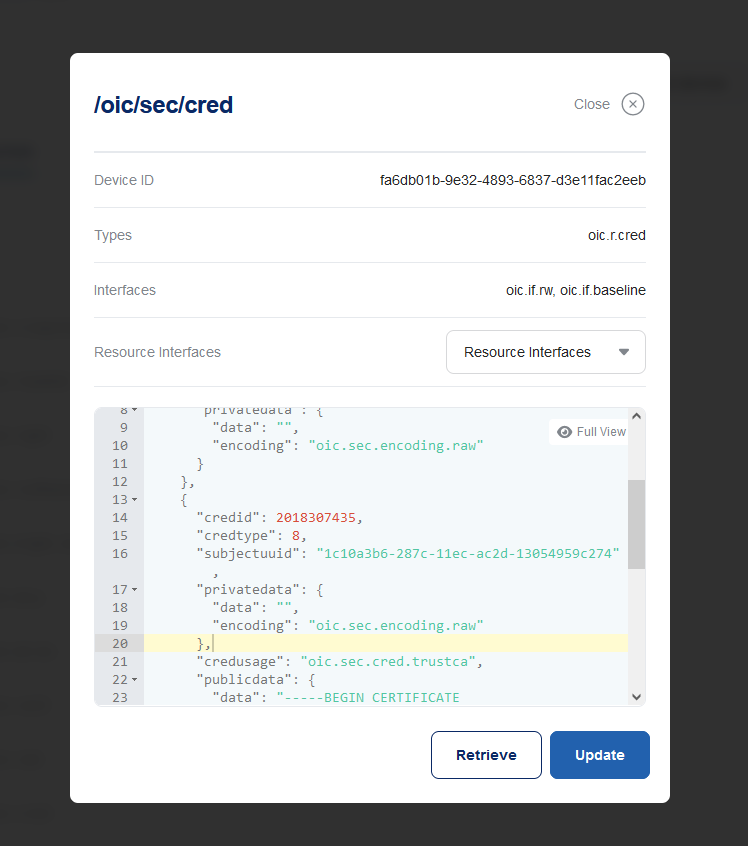
To ensure that the connection is established with https://hawkbit.try.plgd.cloud, we need to verify the server’s certificate using the esp-http-client interface. To achieve this, it is necessary to add a Certificate Authority (CA) certificate to verify the server certificate on the device. This can be accomplished by adding the certificate through the /oic/sec/cred resource.
Alternatively, when using the client-application, onboarding the device to try.plgd.cloud can be performed. This environment employs certificates signed by the same Certificate Authority. Onboarding the device to try.plgd.cloud will automatically add a CA certificate for verifying server certificates.
Ensure that when examining the /oic/sec/cred resource, you have at least one certificate with the credusage of oic.sec.cred.trustca or oic.sec.cred.mfgtrustca. If there are multiple CA certificates, they will be concatenated together in PEM string format.
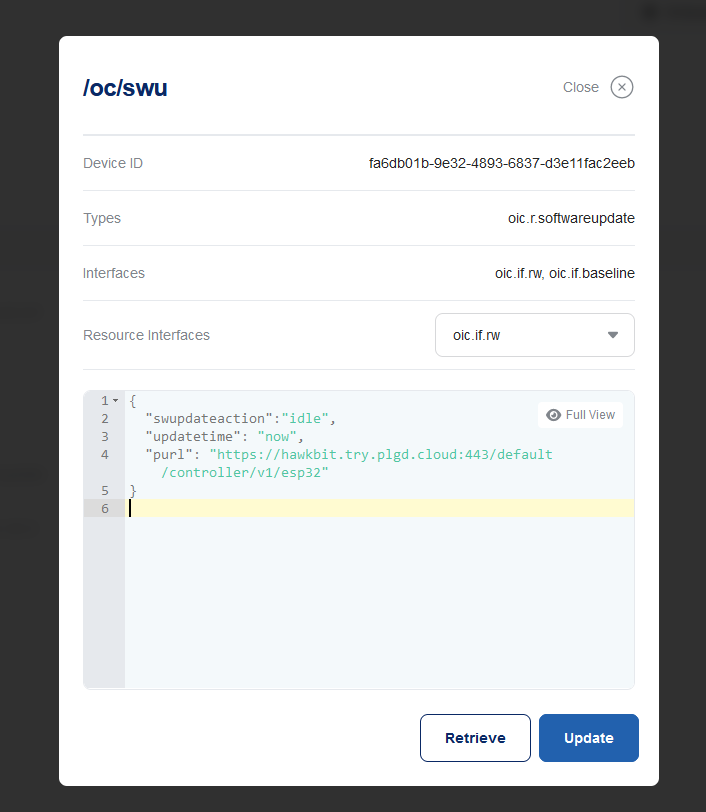
Configure the package URL (purl) property of the /oc/swu resource to contain the address of your running Hawkbit server. The value can be specified in one of two formats:
If the CONTROLLER_ID is not set, its value defaults to the device permanent ID (piid property value from device info).
Update the idle action and set "now" as the update time to create a valid /oc/swu update request:
{
  "swupdateaction":"idle",
  "updatetime": "now",
  "purl": "https://hawkbit.try.plgd.cloud:443/default/controller/v1/esp32"
}
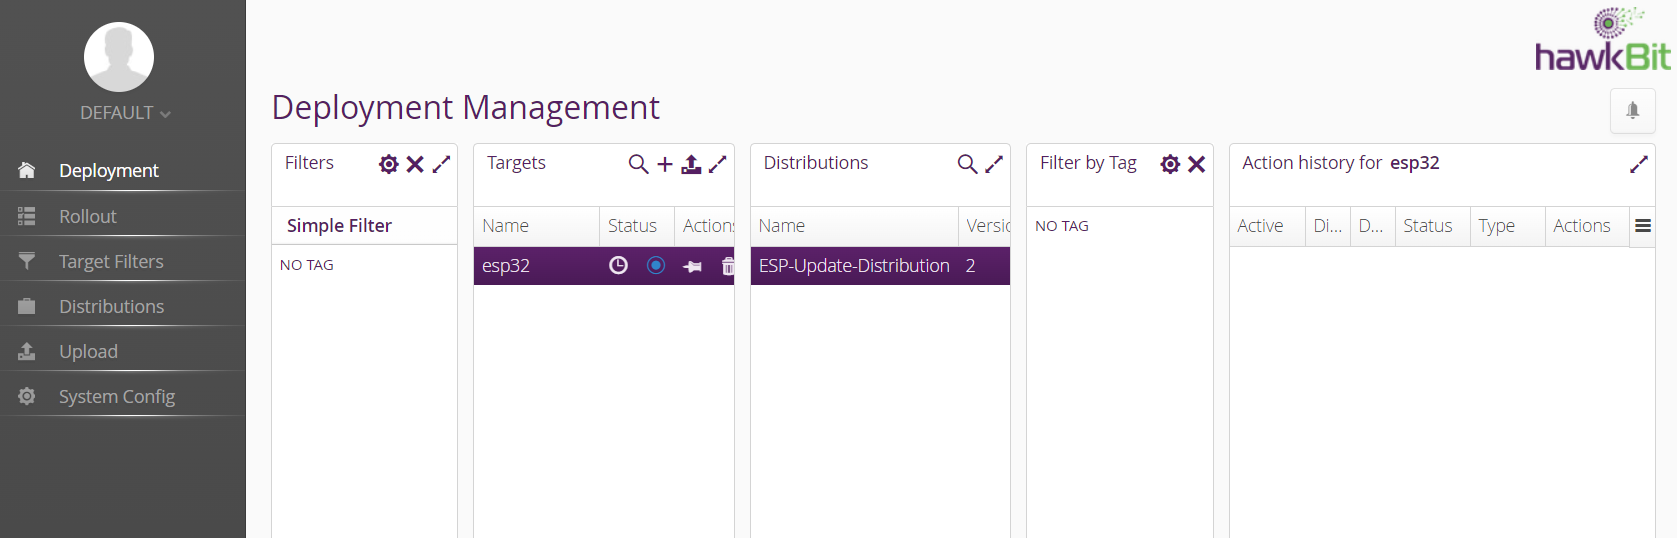
Once the package URL value is set then the device will start polling the Hawkbit server for actions to execute. (The polling interval 60 seconds by default, but once the device successfully connects to Hawkbit server, it will receive the polling interval from Hawkbit.) The device should now appear in the hawkbit server.
To execute a software update, follow these steps:
Navigate to the “Rollout” section.
Create a new Rollout:
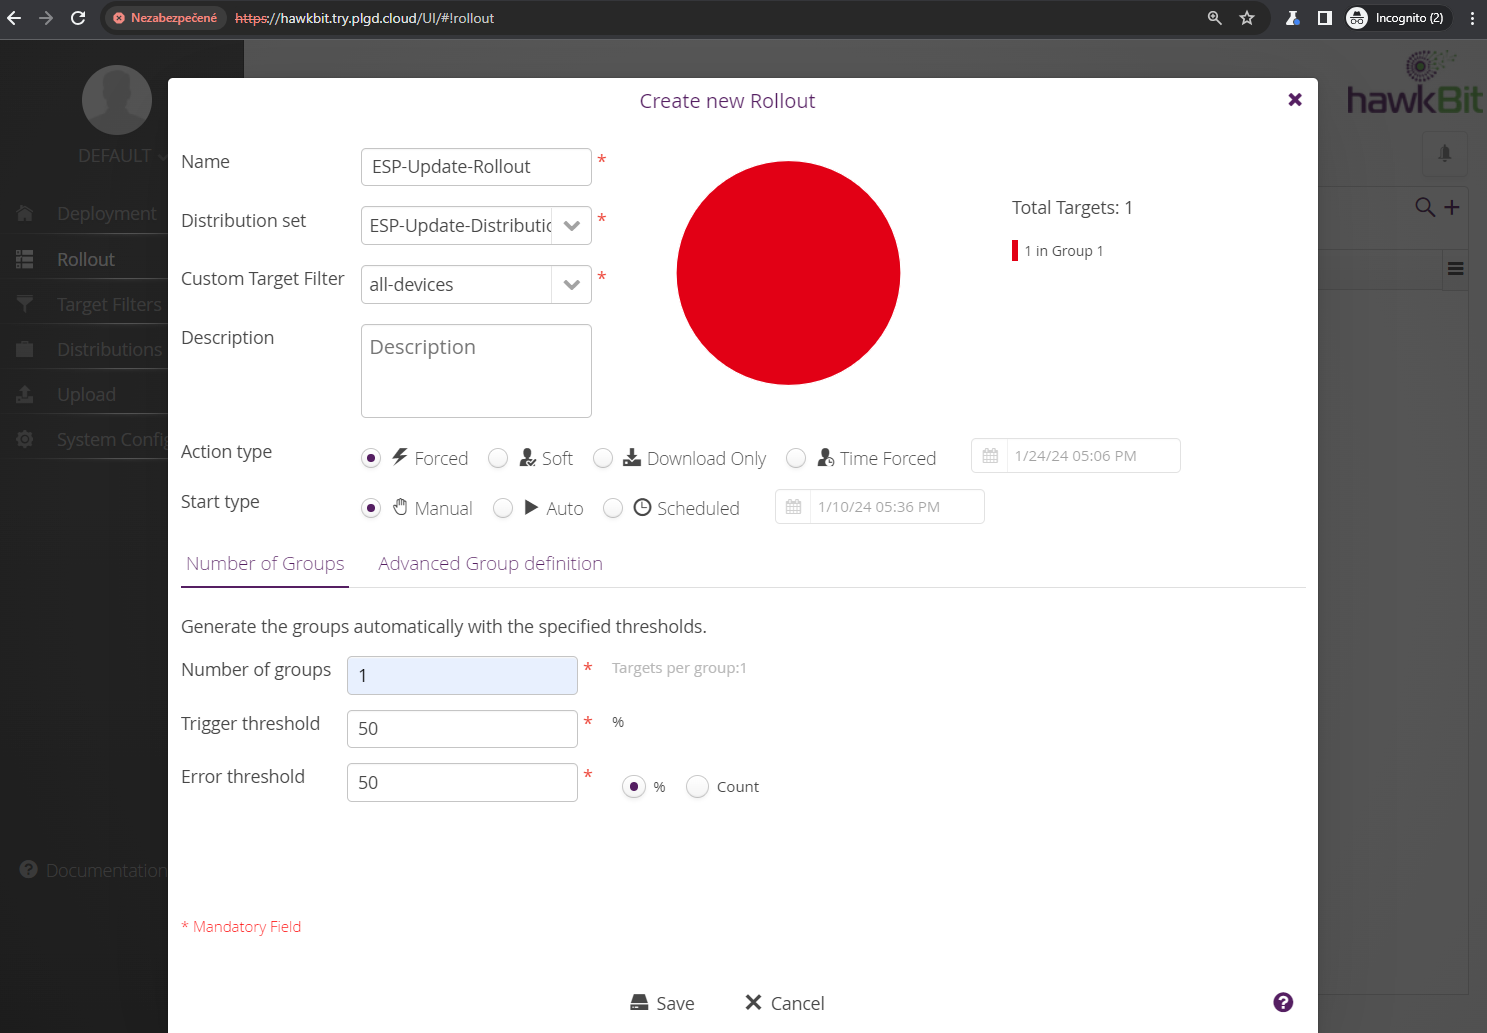
Note: In the current implementation, the Action type and Start type settings of the rollout are ignored. The behavior of the update is controlled by the /oc/swu resource.
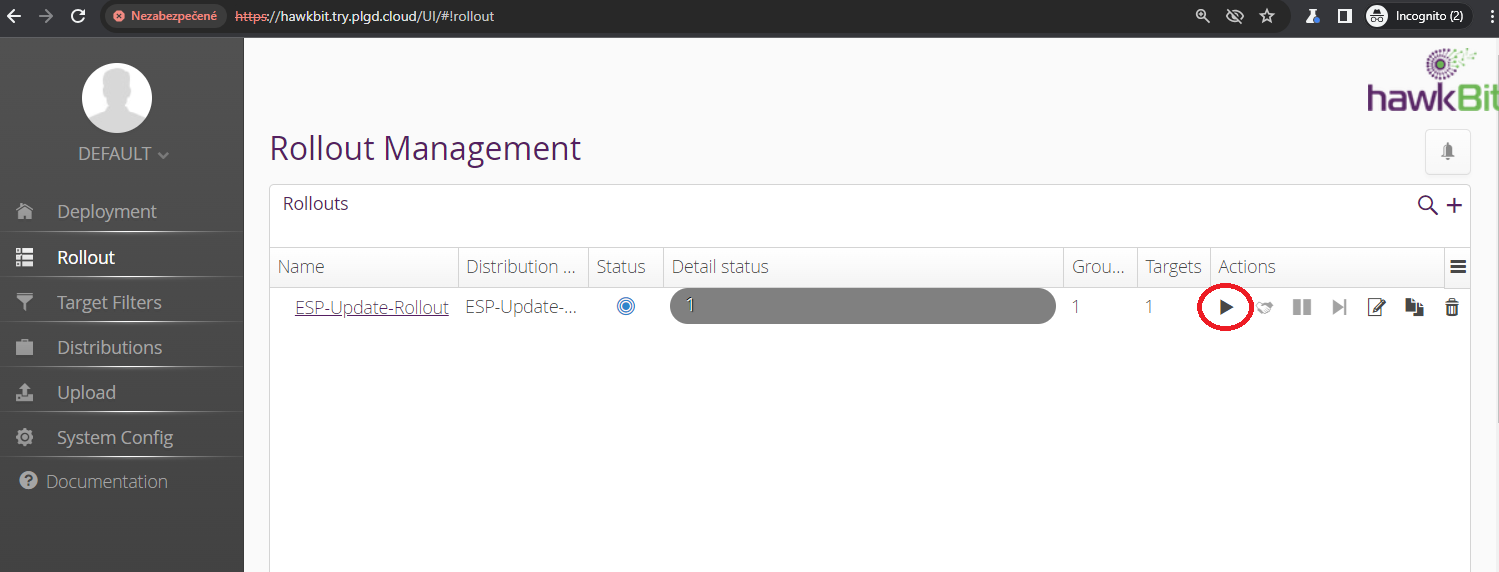
Start the Rollout in Hawkbit:
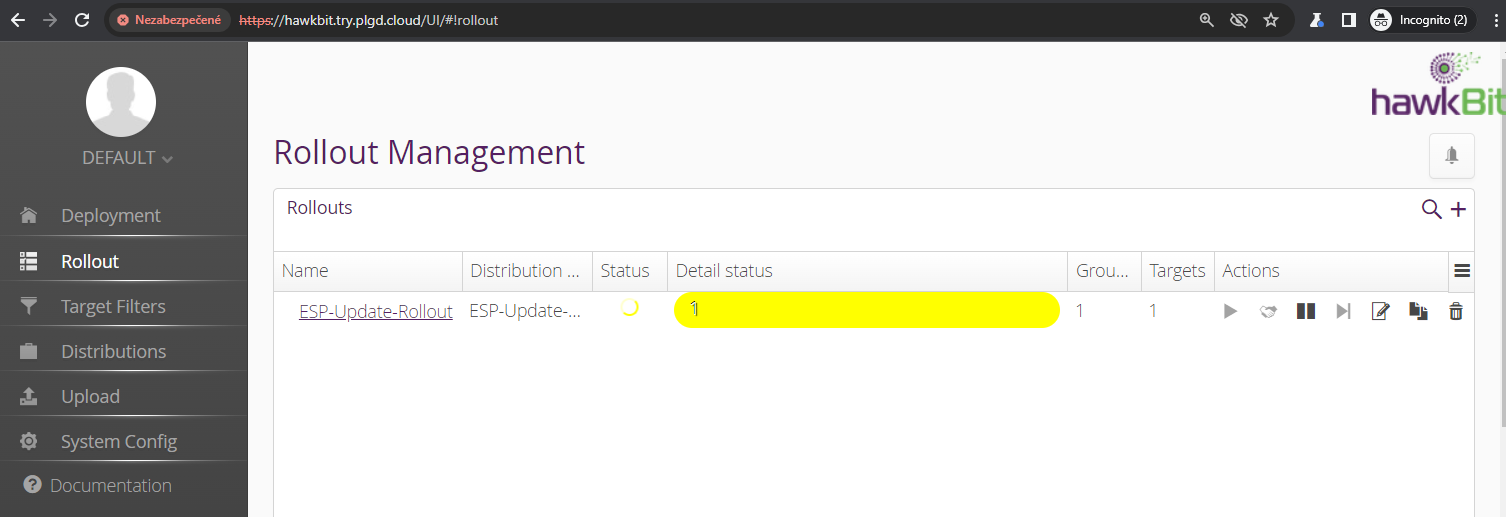
Initiate the Software Update by setting the isac action in the /oc/swu resource:
{
  "swupdateaction": "isac",
  "updatetime": "now",
  "purl": "https://hawkbit.try.plgd.cloud:443/default/controller/v1/esp32"
}
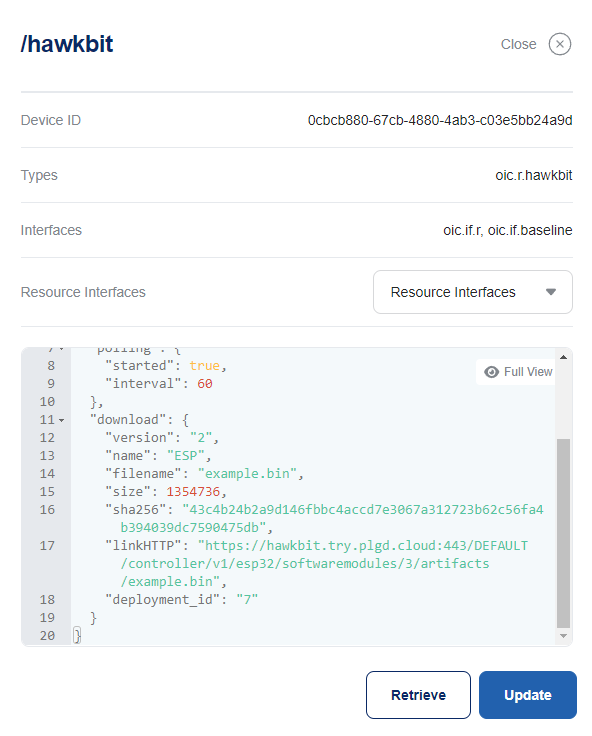
Your device should detect the Hawkbit rollout and information about it should be now available in the download property of the /hawkbit resource:
Download the Software Update by setting the action to isvv in the /oc/swu resource:
  {
    "swupdateaction":"isvv",
    "updatetime": "now",
    "purl": "https://hawkbit.try.plgd.cloud:443/default/controller/v1/esp32"
  }
Depending on the update’s size, the download may take several minutes to complete. During this process, the main loop is blocked, and the ESP device will not respond to other requests until the download finishes. Upon success, the update is copied to the non-active partition of the ESP device. Properties of the update, including u_sha256 (SHA256 checksum of the download), u_psha256 (SHA256 checksum of the non-active partition with the download copied onto it), u_id (Hawkbit internal id of the update), and u_version (version of the update in Hawkbit), should now be available in the /hawkbit resource:
Switch device to the partition with the Software update and restart the device. This is done by using the upgrade action in the /oc/swu resource:
  {
    "swupdateaction":"upgrade",
    "updatetime": "now",
    "purl": "https://hawkbit.try.plgd.cloud:443/default/controller/v1/esp32"
  }
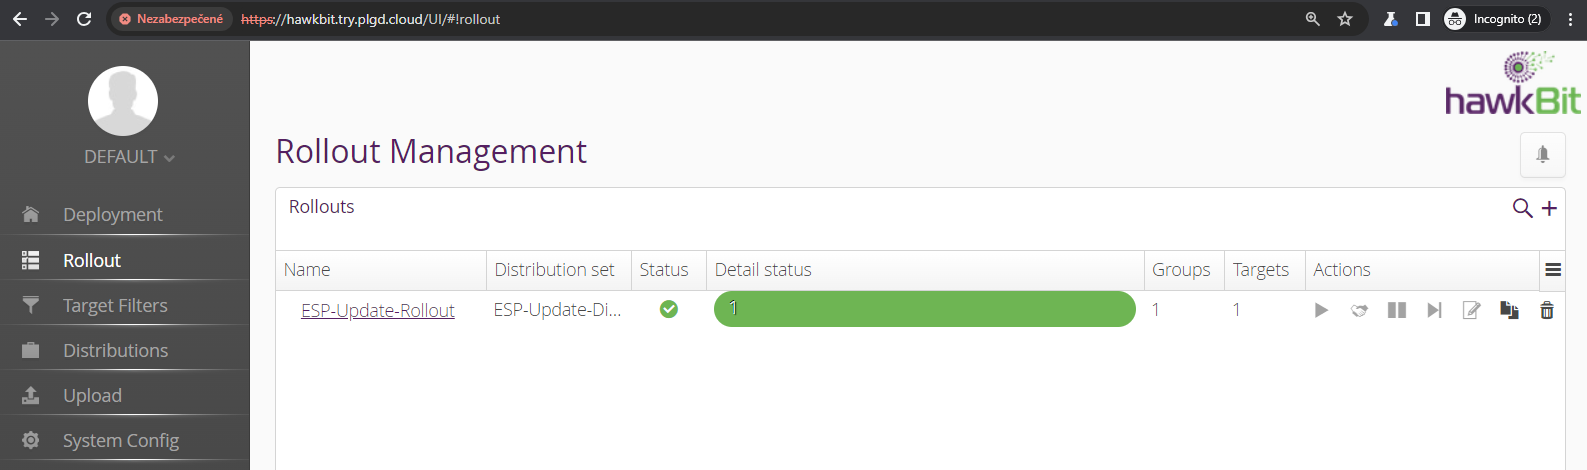
After restarting, the ESP device should be running the new firmware, and the rollout in Hawkbit should be reported as finished.
plgd makes it simpler to build a successful IoT initiative – to create a proof of concept, evaluate, optimize, and scale.

